Eleventy + DatoCMS + Netlify
December 21, 2019
As a web developer I get the occasional ask from friends to help them build a website. I generally don’t mind and am happy to help out my buddies, but lately as I’ve been limited on spare time, I’ve been more and more upfront with some requirements:
- I will only build static sites. I don’t want to be building anyone’s custom CMS or billing system.
- I will only work with my preferred development workflow: Git / GitHub + Netlify and continuous deployment. I’d rather not hand off code in a zip file or configure anyone’s phpMyAdmin console.
As long as my friends are OK with my snobby requirements, I’m happy to oblige. One missing piece from this workflow is the ability for people to update the content after the site has been deployed. Historically the solution to that has either been use a CMS like Wordpress or just update the content manually everytime a change is needed. But recently there’s been a surge of tools that provide a new option: use a headless CMS. A headless CMS allows for content owners to update the content in a third-party admin console and for me to pull in that data at build time so I can continue to use my favorite static-site tools. One of the new headless CMS options is DatoCMS, and I recently had a great experience working with it alongside Eleventy, my current static-site generator of choice. In this post I’ll go through the setup and experience.
I’ve set up an example respository here if you’d like to skip to the code: Eleventy-DatoCMS-Netlify.
What is a Headless CMS Anyway?
First, a quick primer on headless CMS systems. A typical Content Management System (CMS) loads content from a database and renders that content to a template of some sort. Updating the content involves logging into an adminstration console and changing the content. So in this world, the content, administration, and display logic are all together in one codebase. A headless CMS on the other hand, separates the content and adminstration of the content from the view layer. Data is maintained and updated in one system and the view layer pulls in that data at build time to create the static site. If you’ve ever built a static site that had local data files of some sort, it’s just like that except your data files live on a third-party server somewhere.
There are lots of headless CMS options out there, but for my project I chose DatoCMS. The interface was simple, pricing was reasonable, and they have a GraphQL API interface, of which I’m a big fan.
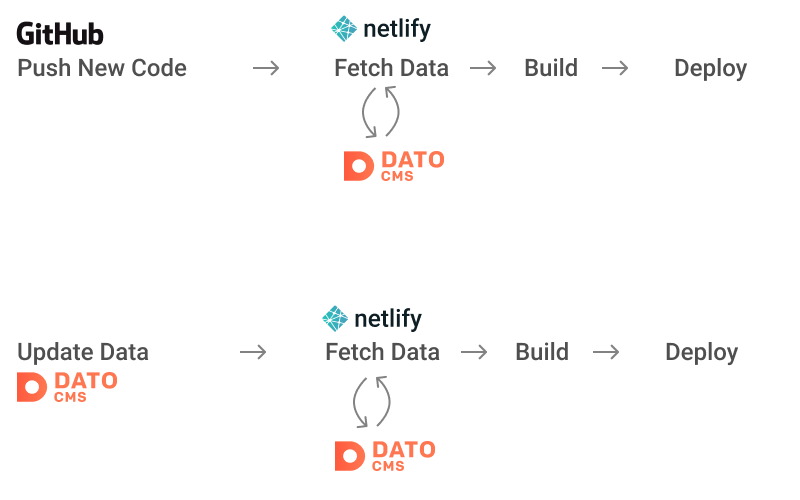
The Data Flow
Since Netlify is the point at which the updated data is fetched from DatoCMS, a new site build can happen either when new site code is pushed to GitHub or when the content is udpated through the Dato admin interface. In the case of data updates, Dato tells Netlify that a new build needs to happen. Netlify then starts the build and asks Dato for the new data.
Fetching Data from DatoCMS
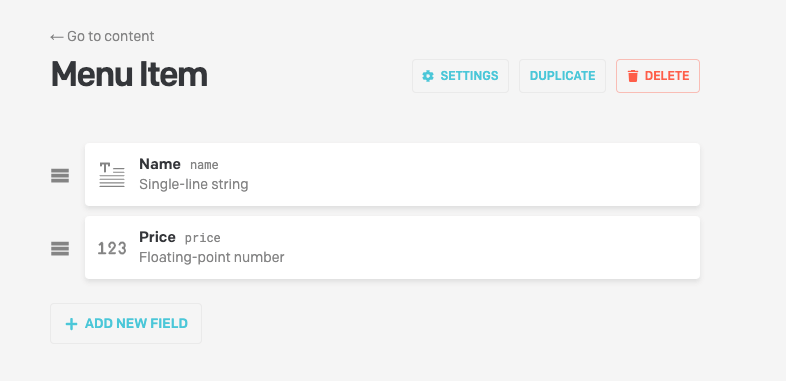
To actually start building a site, we need to be able to get data from DatoCMS. The example we’ll work with is a restaurant building a menu (which was the actual original use case).
Each headless CMS service will have different details, but fundamentally in each one you describe how your content is structured by telling the service what kind of data you’re working with and what each of the properties are. In DatoCMS, these are “models” and “fields” so you may have a model called “Menu Item” that is made of up of a “name” field that is a string and a “price” field that is a number.
This configuration ties directly to the GraphQL query that you make to DatoCMS:
query Site {
  allMenuItems {
    name
    price
  }
}
DatoCMS offers an “API Explorer” on the site which allows you to query your data:

The API Explorer is great because you can tinker with your query until you get it just right and then copy the query and paste it into a file in your codebase. This makes for a really nice workflow where updating the data on the site is a matter of pasting in a new query to a file.
Finally, to actually fetch the data we can use a rather plain fetch call;
const fetch = require("node-fetch");
const path = require("path");
// The DatoCMS token available fro the DatoCMS dashboard
// More on this later...
const token = process.env.DATO_API_TOKEN;
async function fetchData(token) {
// Read the query from the file. A bit nicer to work with once the query
// gets bigger. You can also copy and paste directly from the Dato API
// explorer into the file.
const query = await readFile(path.join(__dirname, "query.graphql"));
const response = await fetch("https://graphql.datocms.com/", {
method: "POST",
headers: {
"Content-Type": "application/json",
Accept: "application/json",
Authorization: `Bearer ${token}`,
},
body: JSON.stringify({
query: query.toString(),
}),
}).then((res) => {
if (res.ok) {
return res.json();
} else {
throw new Error("Aborting: DatoCMS request failed with " + res.status);
}
});
if (response.errors) {
for (let error of response.errors) {
console.error(error.message);
}
throw new Error("Aborting: DatoCMS errors");
} else {
return response.data;
}
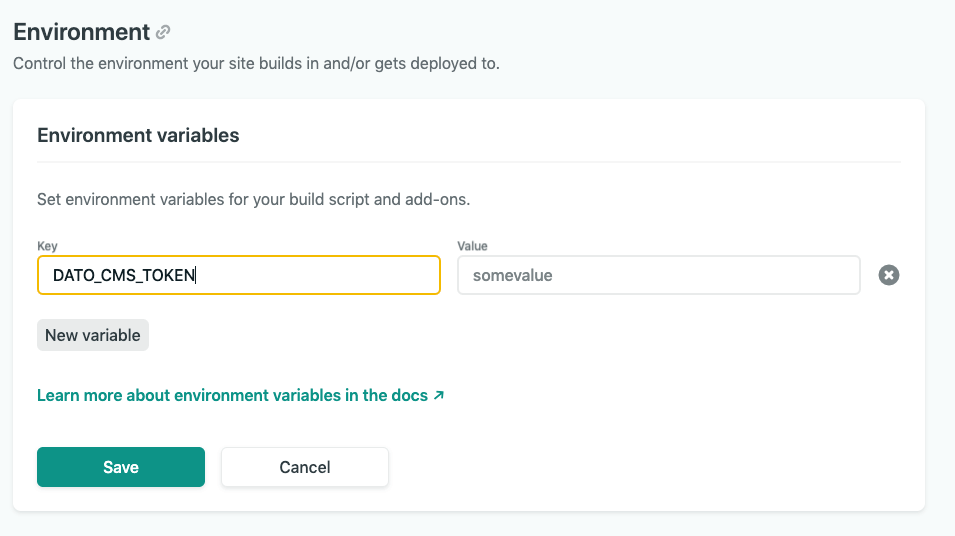
}As you can see above, we need a token from DatoCMS in order have the authorization
necessary to query our site. This is secret, so it lives in an environment
variable. For development, that means doing something like setting the
variable with in a .env file and using something like dotenv to pull in the variables. In production, we’ll have to set the
variable within the Netlify dashboard. More on that soon.
Fetching Data with Eleventy
Above we showed how to fetch data from DatoCMS using a fetch call, but how
does that work with Eleventy? The answer is Eleventy’s JS data files. With JS data files, you can use JS to do anything you need
to do to get your data, including making a network call. By placing a
file within the special _data directory, Eleventy will expose whatever you
return to your template files:
// _data/cms.js
module.exports = async function Cms() {
  const token = process.env.DATO_API_TOKEN;
  const cachePath = path.join(__dirname, "cms.cache.json");
  return await fetchData(token);
};
Then in your templates:
<!-- `cms` because that's what we named the file in the `_data` directory -->
{% for item in cms.allMenuItems %}
<p>
  <strong>Name</strong> {{ item.name }} <strong>Price</strong> {{ item.price }}
</p>
{% endfor %}
That’s it! We now have an Eleventy site fetching data from DatoCMS and building a static site.
Caching Data
The current setup works, but you may see this in your console output:
Writing _site/index.html from ./index.njk.
Benchmark (Data): `./_data/cms.js` took 581ms (66.0%)
Processed 2 files in 0.82 seconds (v0.9.0)
Eleventy is noting that it took a noticeable amount of time to to handle our
_data/cms.js file. We can avoid going over the network each time by writing the DatoCMS response
to a file and using that file if it exists:
const { promisify } = require("util");
const path = require("path");
const fs = require("fs");

const writeFile = promisify(fs.writeFile);
const readFile = promisify(fs.readFile);

module.exports = async function Cms() {
  const token = process.env.DATO_API_TOKEN;
  const cachePath = path.join(__dirname, "cms.cache.json");
  const cache = await getCache(cachePath);

  if (cache) {
    console.log(">> Using cached data");
    return cache;
  } else {
    console.log(">> Fetching data from DatoCMS");
    const data = await fetchData(token);
    await writeFile(cachePath, JSON.stringify(data, null, 2));
    return data;
  }
};

async function getCache(cachePath) {
  try {
    const cache = await readFile(cachePath);
    return JSON.parse(cache);
  } catch (err) {
    // If this fails, that means there is no cache. Return `undefined` to
    // fetch from the network
  }
}
Make sure ignore the cache file in the .gitignore file:
# Cached data
_data/cms.cache.json
This will only fetch fresh data if the _data/cms.cache.json does not exist.
In development, this is usually preferrable as your developing the site as you
probably don’t need to fetch new data every time. In production, there will
never be any cache so we’ll always fetch fresh data.
Deployment
Assuming you have Netlify and GitHub integrated, the only missing piece for being able to deploy our site is telling Netlify what our DatoCMS token is. This is easily done via the Netlify admin dashboard:
Once that is in place, pushing new code to GitHub will trigger a build in Netlify, which will fetch fresh data from DatoCMS!
Integrating DatoCMS with Netlify
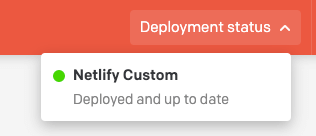
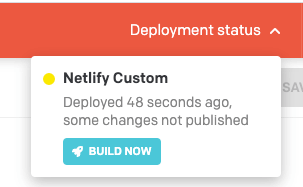
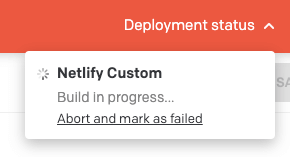
Almost done! The only missing piece left is to be able to deploy a new version of our site whenever the data content changes. To do that, we need to a “Deployment Environment” in DatoCMS. A deployment environment in Dato is how you configure DatoCMS to re-build your site based on the services you’re using. After you’ve set up a deployment environment, you’ll see these notifications in the top right:
DatoCMS has a great integration with Netlify that essentially makes this a one-click setup. You authorize DatoCMS to your Netlify site, and it will more-or-less do the rest. That said, I actually had some issues with that because at the time it seemed that outgoing webhooks were not allowed on the free plan of Netlify. This meant that I could trigger a build from DatoCMS, but Dato would never be notified of the status of the build. This looks to not be an issue anymore so if the integration works for you, then you should use it! Regardless, I thought it would be interesting to see how to set up a custom deployment environment using Netlify functions.
Custom Deployment Environment with Netlify Functions
At the end of the day, communication between services is usually just each
service sending POST requests to each other. By utilizing Netlify’s functions
and event triggers, we
can set up our own custom deployment environment.
First, we need to set up a build hook in Netlify:
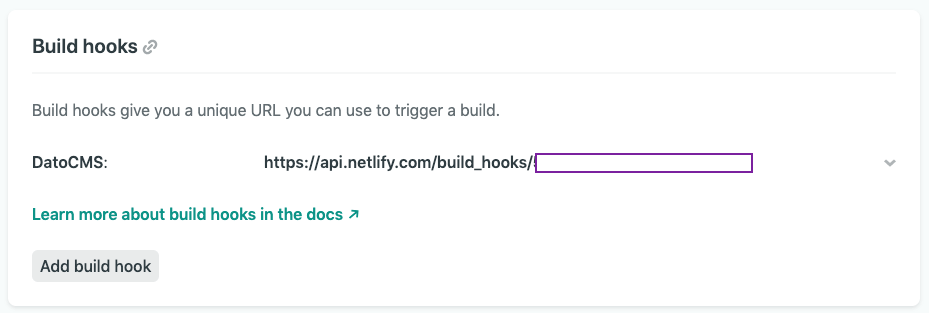
This is the URL that we want DatoCMS to POST whenever it wants to trigger a
new build.
Then, within DatoCMS, choose “Custom webhook” to set up the custom deployment environment:
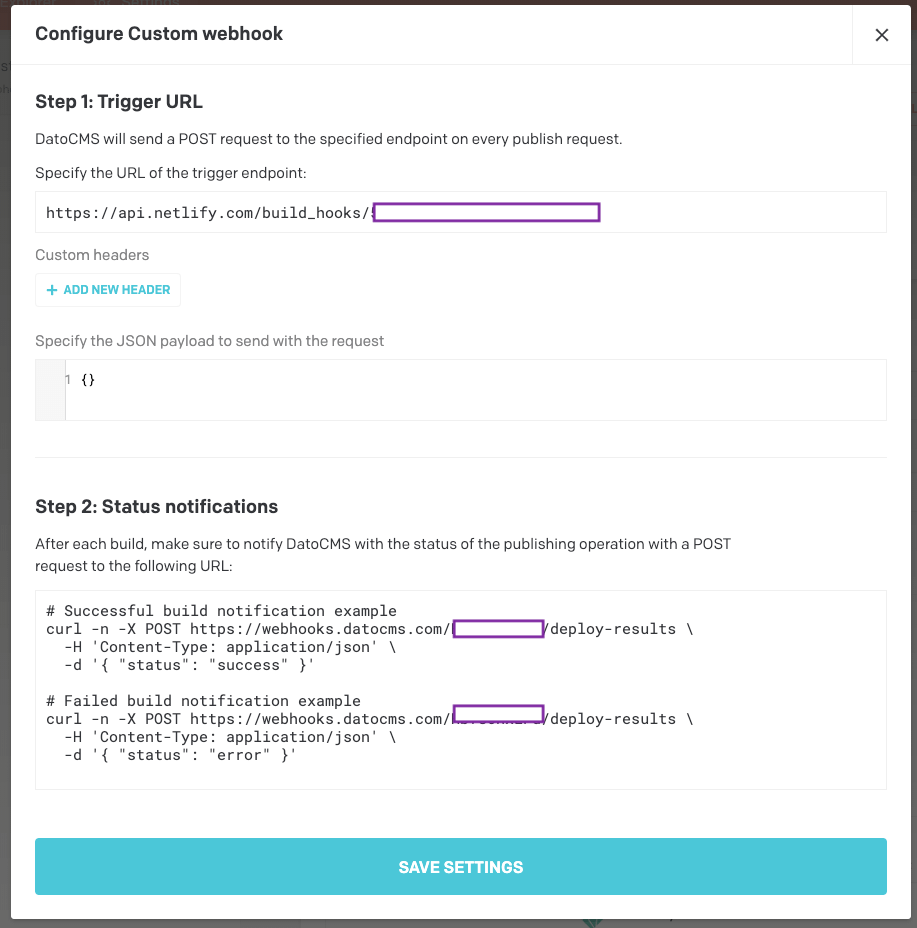
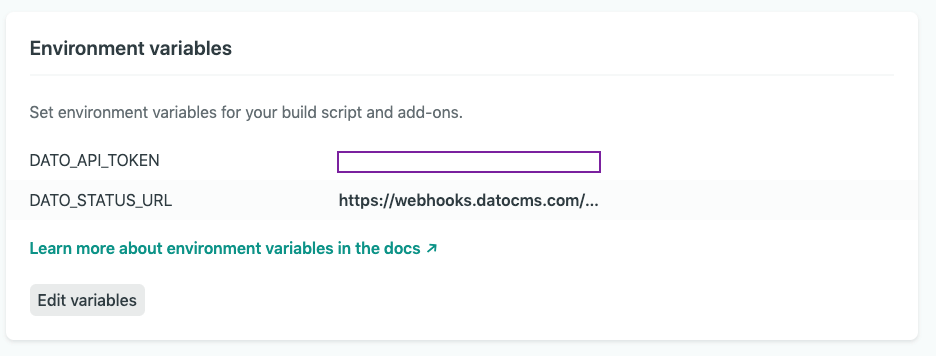
Paste in the build hook from Netlify in the “Trigger URL” input. In the “Status notifications” section, Dato is displaying the information that we need to send back to Dato from Netlify when the builds are complete. This is how Dato knows what happened from Netlify. We’ll need to create a new environment variable in Netlify with this info:
Lastly, we need to create two new functions: one named deploy-succeeded.js
and one named deploy-failed.js. The names are significant as they indicate
to Netlify that these are functions to be triggered when those specific
deploy events happened. In a functions folder:
// functions/deploy-succeeded.js
const fetch = require("node-fetch");

const { DATO_STATUS_URL } = process.env;

const data = JSON.stringify({ status: "success" });

exports.handler = async function (_event, _context) {
  let response;

  try {
    response = await fetch(DATO_STATUS_URL, {
      method: "POST",
      headers: {
        "Content-Type": "application/json",
      },
      body: data,
    });
  } catch (err) {
    return {
      statusCode: err.statusCode || 500,
      body: JSON.stringify({
        error: err.message,
      }),
    };
  }

  return {
    statusCode: 200,
    body: JSON.stringify({
      data: response,
    }),
  };
};
I’ll leave the deploy-failed.js out, but it’s pretty much the same except
with a different payload.
Conclusion
Phew! After typing all of this out, I can definitely see how this type of setup may seem overly complicated and you may be thinking that you might as well just deploy a Wordpress site. In my case, I highly value a workflow that allows me to iterate fast and also minimizes my overall maintenance cost. Static sites are extremely low maintenance since there are no databases or servers to deal with.
I can say that this set up has been running smoothly for months now and my friends love their new CMS setup. They previously had a custom Wordpress site built for them by someone who had since abandoned them, leaving them with an out-of-date Wordpress deployment and a pretty horrible editing experience. If you enjoy building static site and want to extend your offering to allow for dynamic content, I highly recommend giving this setup a try!